
Animation basics in one minute

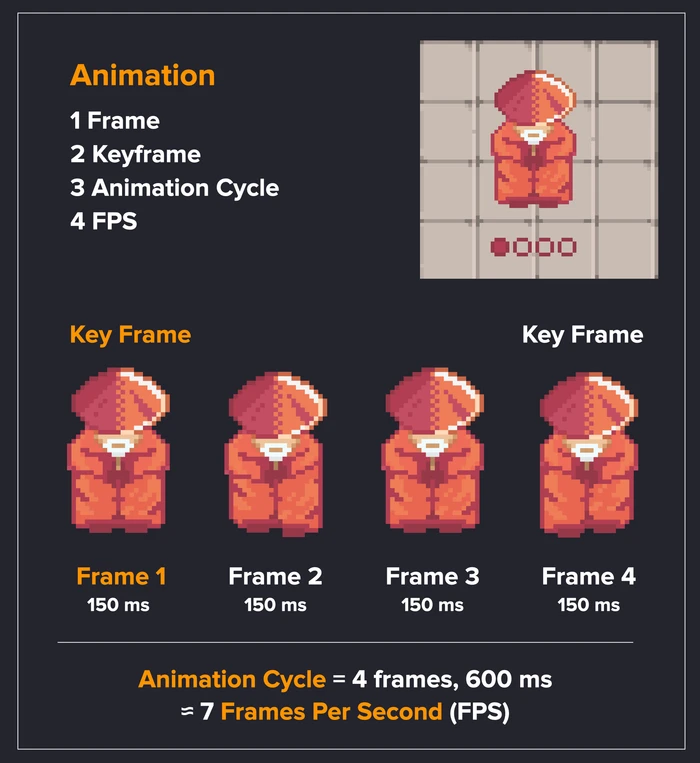
- Animation is an action shown as a sequence of images, called frames.
- A frame is one single image of the animation. This one has four.
- A keyframe is a frame that marks where an action starts or ends. Here the first and the last frame are keyframes.
- The animation cycle is the duration and the number of frames together. Each frame here lasts 150 milliseconds, four frames make 600 milliseconds.
- Frames per second is how many frames you see in one second: 1000 divided by 150 is about seven.
Only seven frames per second, and it still looks smooth. Pixel art is forgiving with low frame rates. Cartoons usually start at 24 frames per second and go much higher, but in pixel art a few frames go a long way.
What moves in a step
Frames 1 and 3 are exactly the same starting pose. Frames 2 and 4 are the steps, left and right. So you only work on two frames.
Start with the outside of the sprite. On the left step, the left leg and part of the robe go down one pixel, the elbow goes down one pixel, and the hat goes down one pixel. Then back up. On the right step it's the mirror, and the hat nods down again. With every step, the sage nods his head.
Then the inside. While the left leg goes down, the right arm goes down too, and the left arm gets a little shorter. The pattern on the robe shifts one pixel and leans a bit, like the cloth moves with the body.
That's a lot to watch at once. If it feels like too much, start simple: animate only the steps. Then add the hat, then the arms, then the texture on the robe.
A tip: on the step frames the whole upper body sits one pixel lower, so a lot of pixels change. Select that part (M) and move it down one pixel (V), in Aseprite and in the trainer alike. Then fix the details by hand.
Onion skin settings
In Aseprite I set the onion skin to show behind the sprite, in the red and blue tint mode, at about half opacity. Then you see exactly which pixels will move in the next frame. In the trainer the previous frame shows in red.
Your turn: four directions
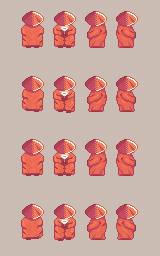
Once the front works, try the back, the left and the right side. Same idea: frames 1 and 3 are the starting pose, frames 2 and 4 are the steps. I'd do the back next, since it's close to the front. Look at the details: the bottom of the robe swings a little with every step, and the texture shifts. Those small things give a walk its rhythm. The side view has its own trainer: side view walk cycle.
And once you're confident, experiment. Change how the texture moves, or the limbs, or the head. It's your animation.