How the water is built
This is one tile, 40 by 40 pixels. It has four parts: the main body of the water, which is just the background color, the wave pattern on top, the shading between the waves for depth, and the highlights on the edges of the waves.
The colors: one mid-tone for the water, a lighter one for the waves, three shades for shading and two light tones for highlights.
Step 1: The wave pattern

At first the pattern looks random. Look again: there are vertical lines all across the tile, and curved horizontal lines that connect them. Together they make the waves.
You could draw your own, and later you should, as many as you like. But for the first time it's much easier if we all start from the same pattern, so I give it to you as a template. That's why it's ready in the trainer.
Step 2: Shading in three layers

Take the lightest shade and fill the spaces inside the wave pattern. Don't invent anything, just follow the shapes you're given. Don't fill them completely either.
Then the second shade, on top of the first, but on a smaller area, so the first one still shows around it. Then the darkest shade, just a few pixels here and there. Every layer smaller than the one before. That's what gives the water its depth.
Step 3: Highlights

Why is the light where it is? The waves stick up from the surface a little, so their tips catch the sunlight for a moment as the water moves. The spaces between the waves sit lower, so they get less light. That's why they're dark.
So put the lighter highlight along the wave lines, one pixel wide in some places and two in others. Water is never even. Then the lightest color, again on a smaller area, just a few pixels where the first highlight is.
From one tile to a sea
This is just one tile. Later in the course we turn tiles like this into tilesets and tilemaps, so one small piece can cover a whole ocean or lake in your game. See how in the tileset lesson.
Water in other views
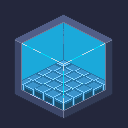
The same idea works in every view of a game. In a side view platformer, water is a band between two banks: a light line on top where the surface catches the sky, and a few lighter specks below. In isometric, it fills a box: the far walls show through, and a light grid on the floor makes the depth readable.